


In animals in intensive care, placing a central venous jugular catheter (CVJC) can be necessary if: peripheral intravenous access is difficult; repeated blood sampling is needed; large fluid infusions or drug administration are needed (especially parenteral nutrition and irritant drugs that can cause thrombophlebitis if given peripherally), and for monitoring of central venous pressure and mixed venous oxygen saturation (Adamantos and Alwood, 2018). Compared with peripheral venous catheters, CVJC have a larger diameter permitting rapid infusion of solutions. They can also stay in situ for much longer (more than 5 days) because of the length, softness and material used. They are commonly made of polyurethane which is the least thrombogenic material available and can be coated with antibacterials to reduce the risk of infection (Bodenham et al, 2016; Adamantos and Alwood, 2018).
The over the wire technique used to place CVJC percutaneously and described here is the modified Seldinger technique (Portillo et al, 2006; Bodenham et al, 2016). For CVJC placement the animal needs to be in lateral recumbency for the duration of the procedure, either under sedation or general anaesthesia, unless the animal is very obtunded. The catheter tip is positioned at the cranial vena cava at the level of the fourth intercostal space (Portillo et al, 2006). CVJC kits come in a variety of sizes and with one or four intravenous ports (Bodenham et al, 2016).
Complications related to CVJC placement, resulting from the catheter remaining in situ, are well described in the human literature (Ruesch et al, 2002). In the veterinary field the data are growing and suggest a higher complication rate than in the humans, although that might be because of the small body of evidence and less experience in placing them. During placement of the CVJC, 51% of cases have procedural complications such as cardiac dysrhythmias, haematoma, placement failure or dislodgment (Reminga et al, 2018). In 41% of cats and 27–39% of dogs complications have been described once the CVJC is in place, including mechanical obstruction, skin irritation, malposition and inflammation (Adamantos et al, 2010; Reminga et al, 2018). Risk factors associated with indwelling CVJC are related to the duration of the CVJC in the animal, number of attempts to place it, and the administration of irritant drugs (Adamantos et al, 2010; Reminga et al, 2018). However, there is a low incidence of life-threatening complications (Marsh-Ng et al, 2007; Adamantos et al, 2010; Reminga et al, 2018).
Procedure
The following describes the method for placing the CVJC:
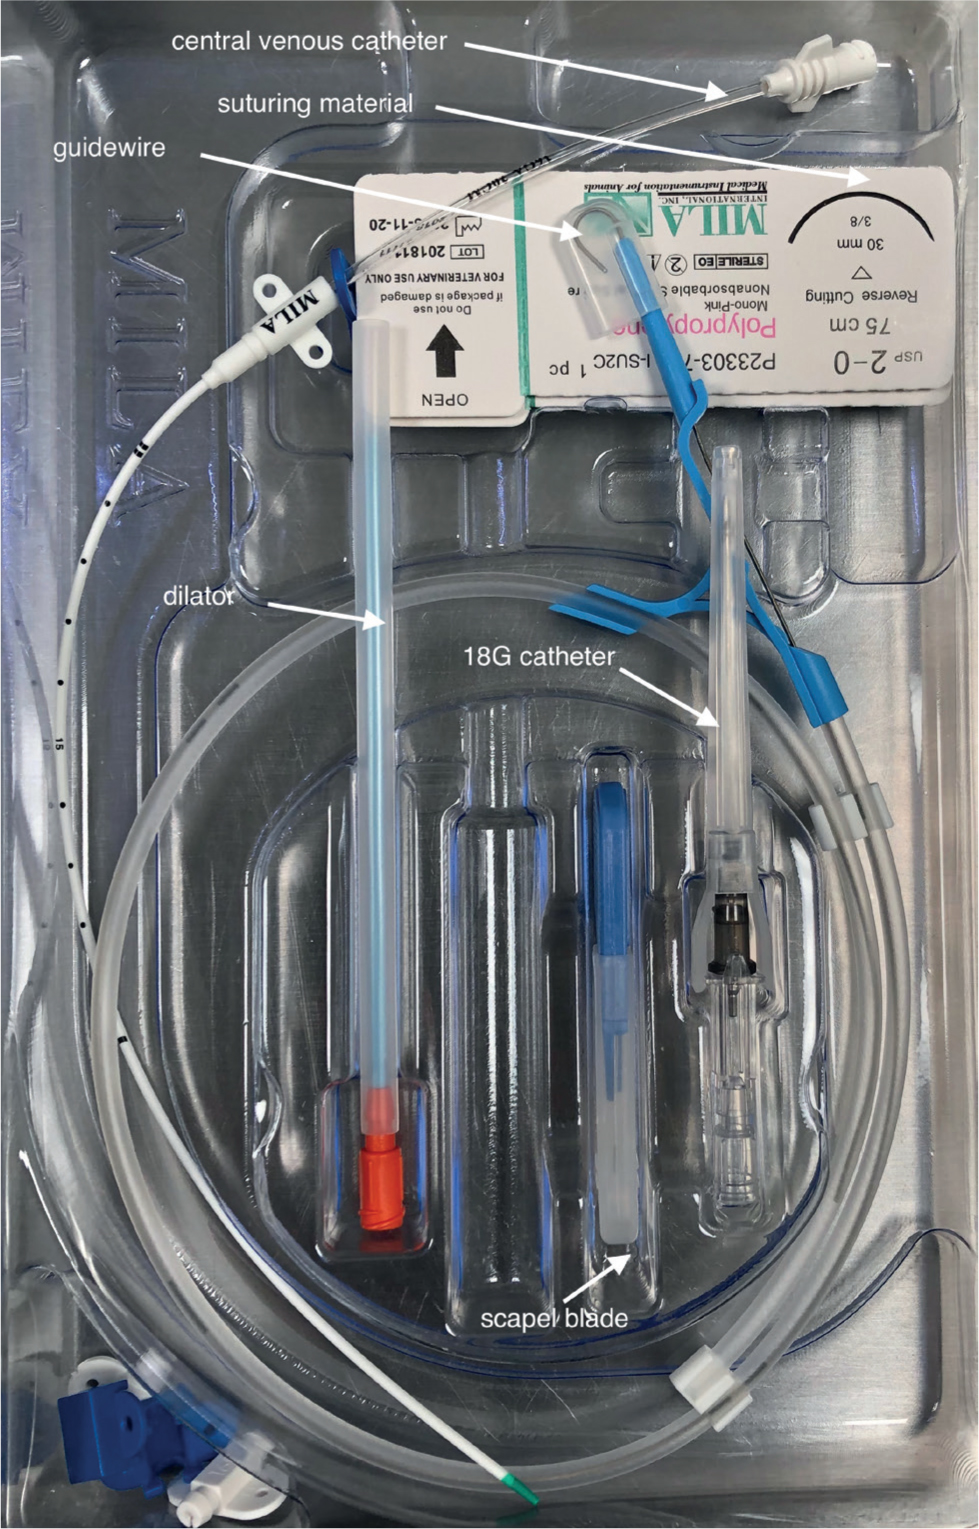
- Clinical judgement determines the size of the CVJC and the number of ports required. The gauge (G) ranges from 4Fr (18G) to 7Fr (12G) with a length between 8 and 20 cm. It is important that the length of the CVJC is premeasured from the insertion site to the fourth intercostal space if it is going to be used for central venous pressure measurement. The CVJC kit should contain everything required for the procedure including: fenestrated drape, scalpel blade, sterile swabs, 18G intravenous catheter, suture nylon on a straight needle, caps to place on the end of the ports, the CVJC and the guidewire with a soft tip on one end with the advancer (Figure 1).
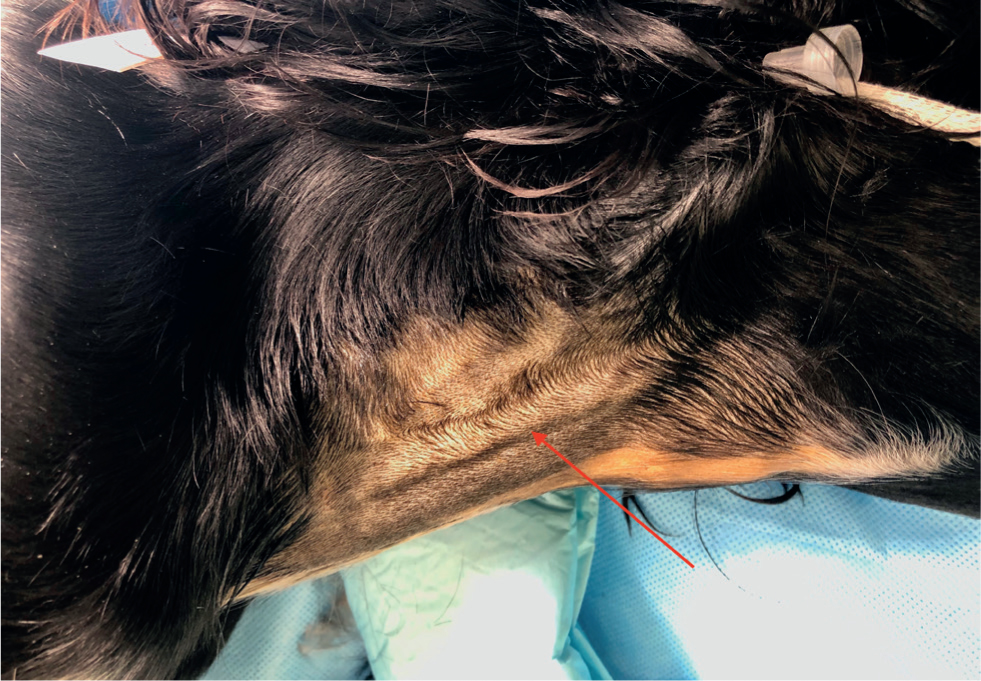
- Place the animal in lateral recumbency with a sandbag under the neck, this will help to make the jugular vein more prominent and easier to visualise for penetration (Figure 2, the red arrow is pointing to the distended jugular vein. The site has been prepared with chlorhexidine, causing the orange appearance).
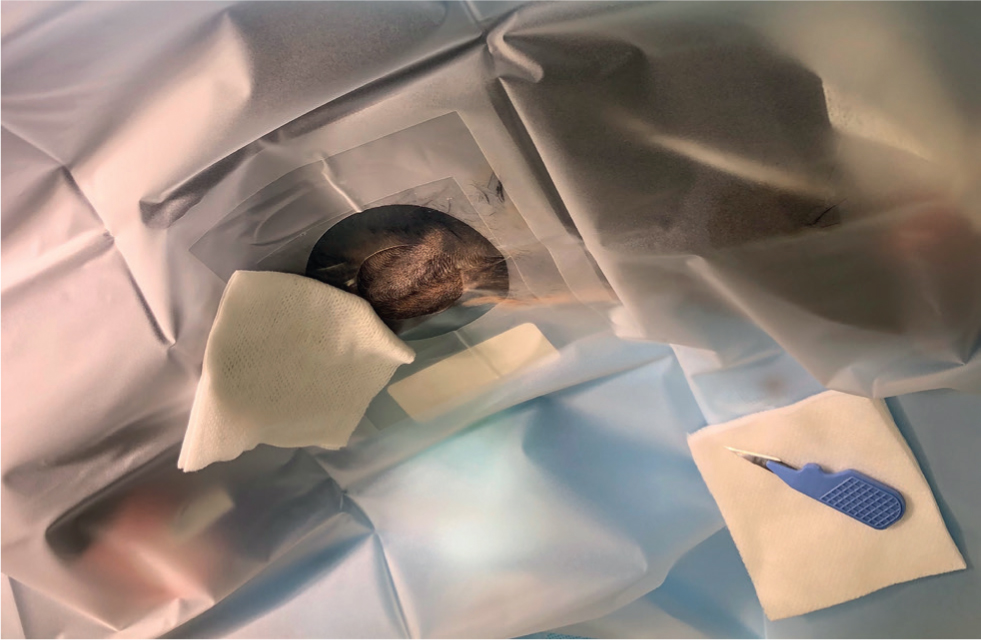
- It is highly recommended to have a large clipped area (caudal to the ear to the entrance of the chest) and to prepare the skin aseptically. Use of the drape and sterile gloves is also important, as strict asepsis is vital in reducing infections (Bodenham et al, 2016) (Figure 3).
- Identify the area for incision over the jugular vein, lift the skin and make a stab incision with the scalpel blade.
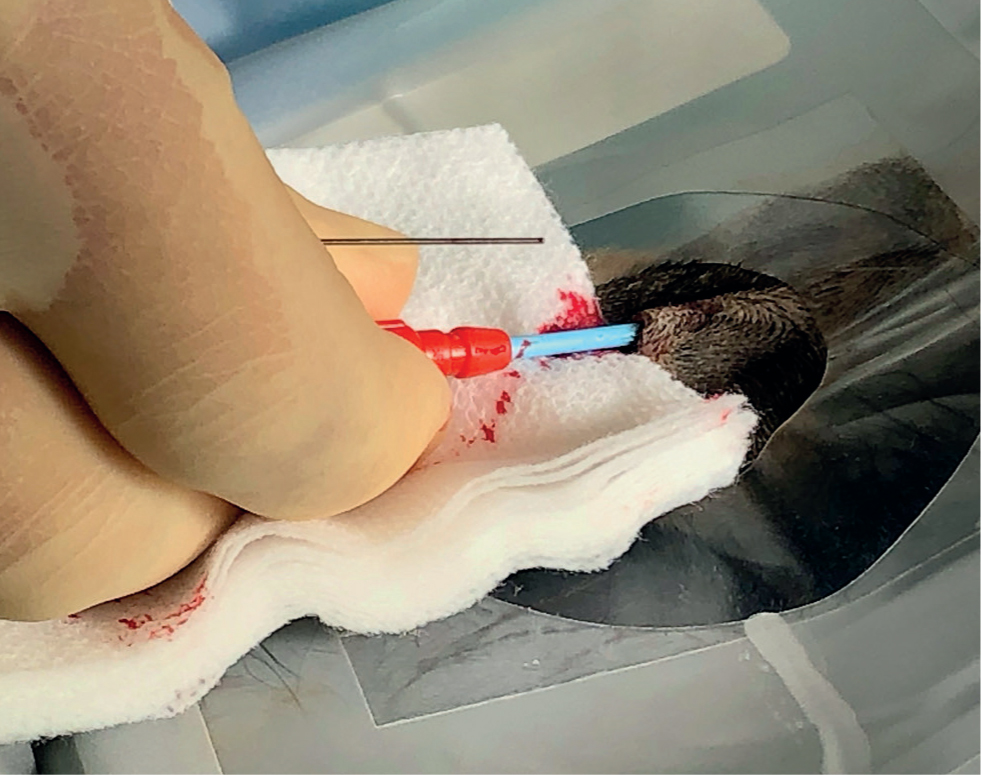
- Occlude the jugular vein below the catheterisation site and visualise the jugular vein. This can be done by you or by someone else (Figure 4).
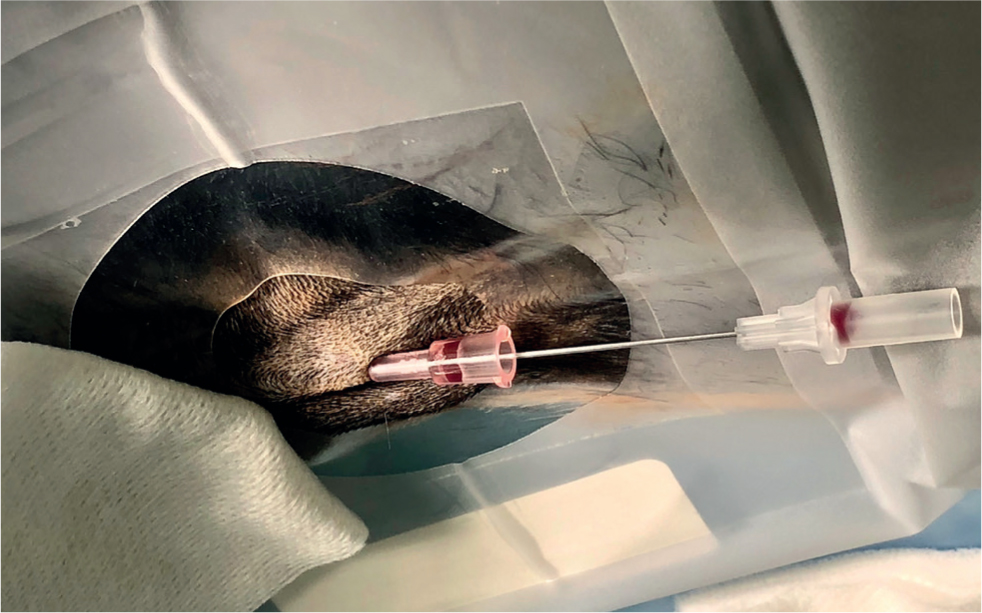
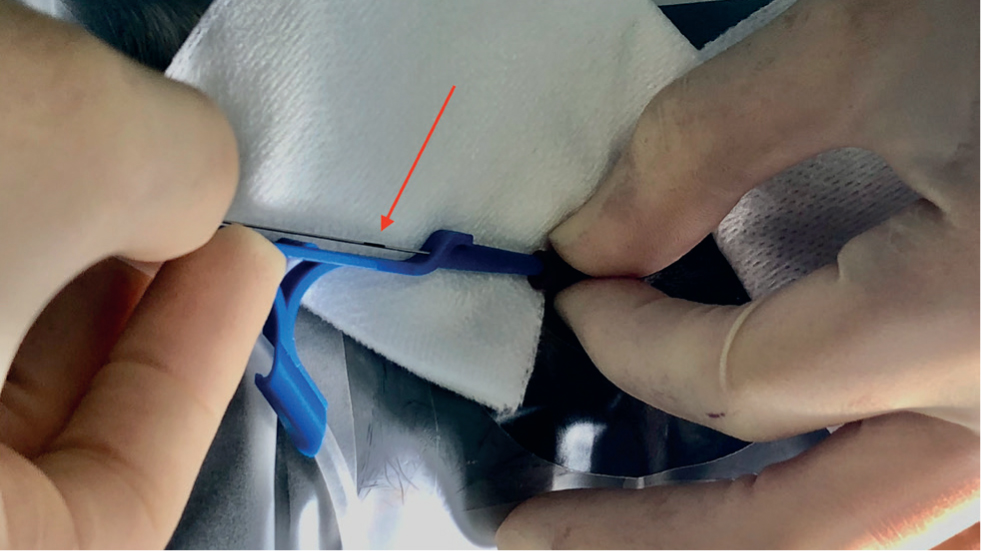
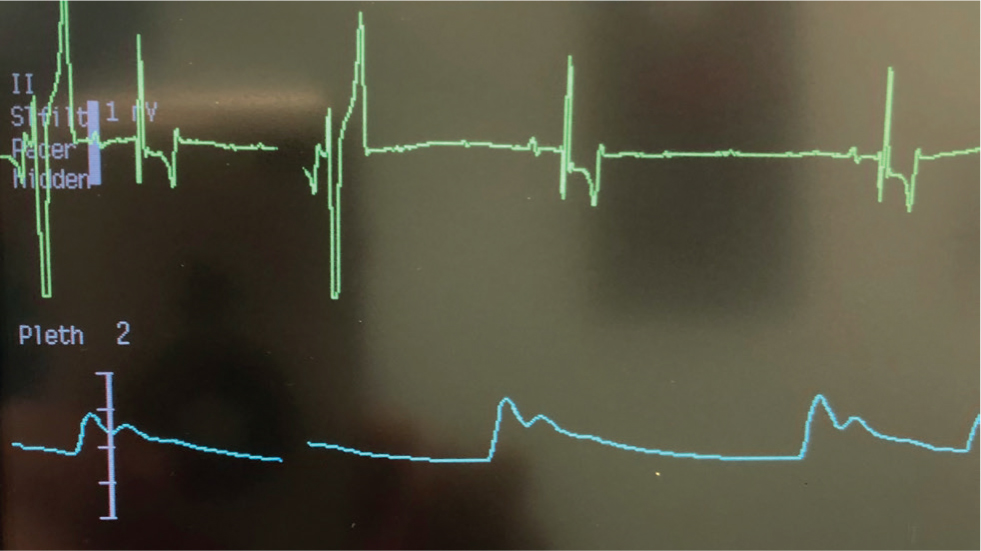
- Introduce the catheter 18G needle/stylet into the vein that is raised (Figure 5) — blood in the hub will confirm correct placement. Advance it a little more; if there is still blood flowing, advance the stylet over the needle without moving it. There should be no resistance and blood should be coming from the stylet if the vein is still raised (Figure 6). Once the stylet is in place, you can stop raising. This is usually the most challenging part of the procedure. If you have gone through the vein, it will cause a haematoma that make the second attempt more challenging. The guidewire usually has a J-shaped tip to decrease the risk of damage to the vessel wall. This needs to be withdrawn before passing it down the lumen of the catheter. There are black stripes to indicate the 10 cm marks (Figure 7, the red arrow is pointing to the 10 cm marker). Electrocardiography should be placed on the patient and monitored for arrhythmias, which will occur if the guidewire enters the heart. Figure 8 is an example of potential ventricular complexes that you might get if the wire enters the heart; if this happens the wire should be pulled back until the ventricular complexes disappear, and the catheter can then be removed. It is important that you or your assistant always hold on to the wire (Figure 9, the red arrow is pointing to the 10 cm marker, the white piece of plastic is the cover that was over the dilator).
- A smaller dilator is then passed over the guidewire, gentle corkscrewing motions help the dilator pass through the blood vessel wall (Figure 10). There are usually two dilators in the kit but the bigger dilator is not always needed, unless there is resistance when passing the catheter over the guidewire.
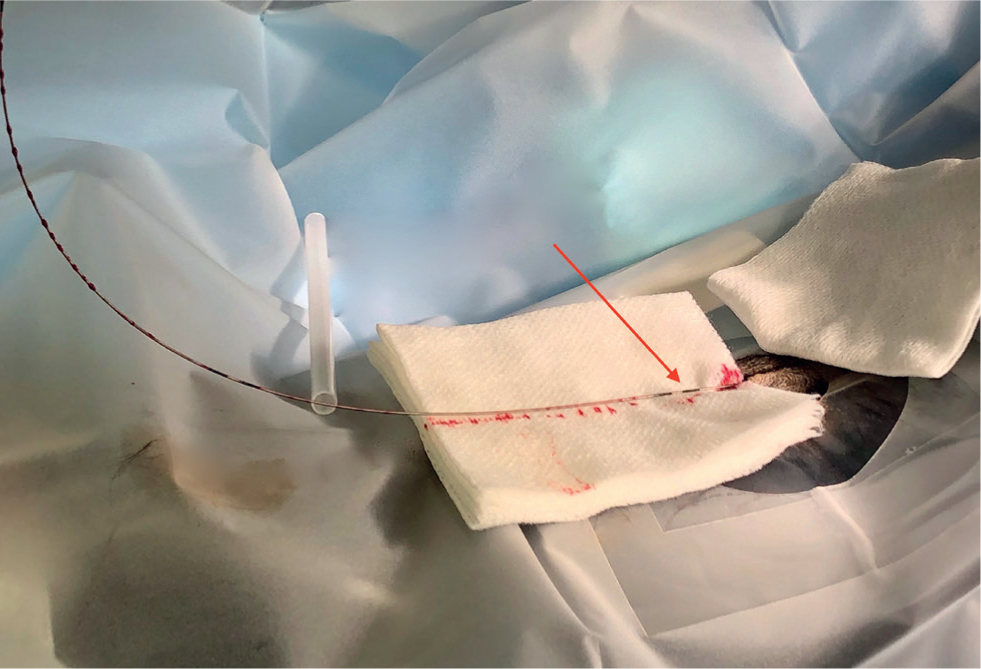
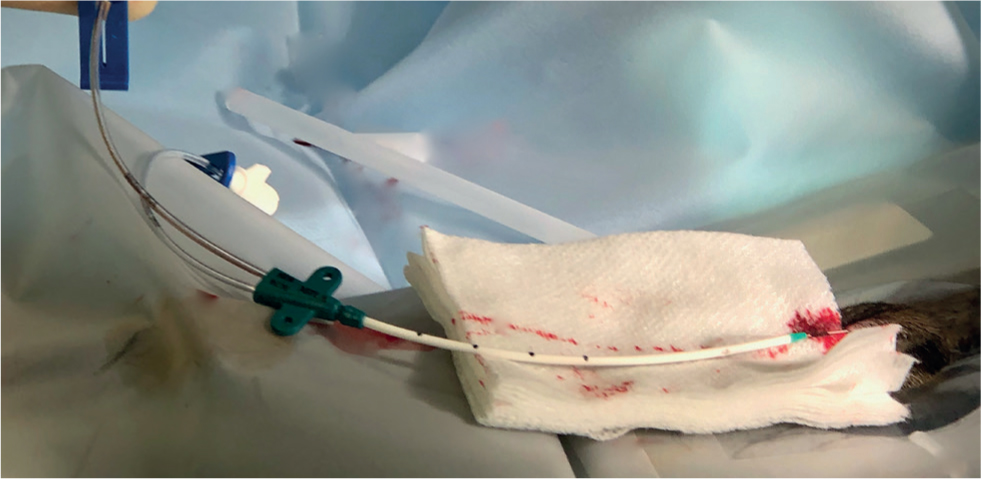
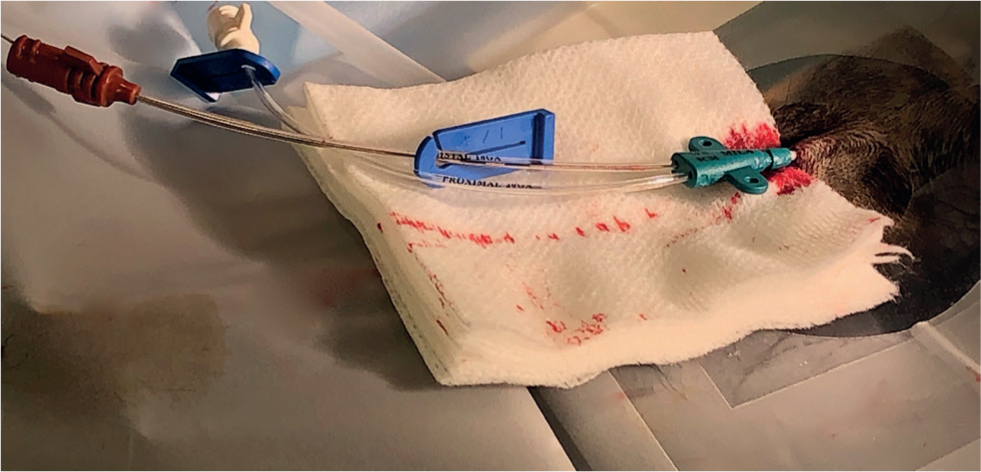
- Once the dilator is removed, thread the catheter over the guidewire to the desired length (Figure 11, the distal port is not clamped off as it has to stay patent for the wire, while the proximal port should be clamped. The white piece of plastic in the picture is the cover that was over the dilator) (Figure 12, the proximal port should be clamped off). Again, as stated before, it is important to always hold on to the wire when inserting the catheter, as there is an inadvertent risk of losing the guidewire intravascularly. It is useful to have sterile swabs available over the site when the dilator is removed. This is because a large hole has now been made in the wall of the vein and it can bleed quite rapidly. Swabs help to reduce this and keep the site clean.
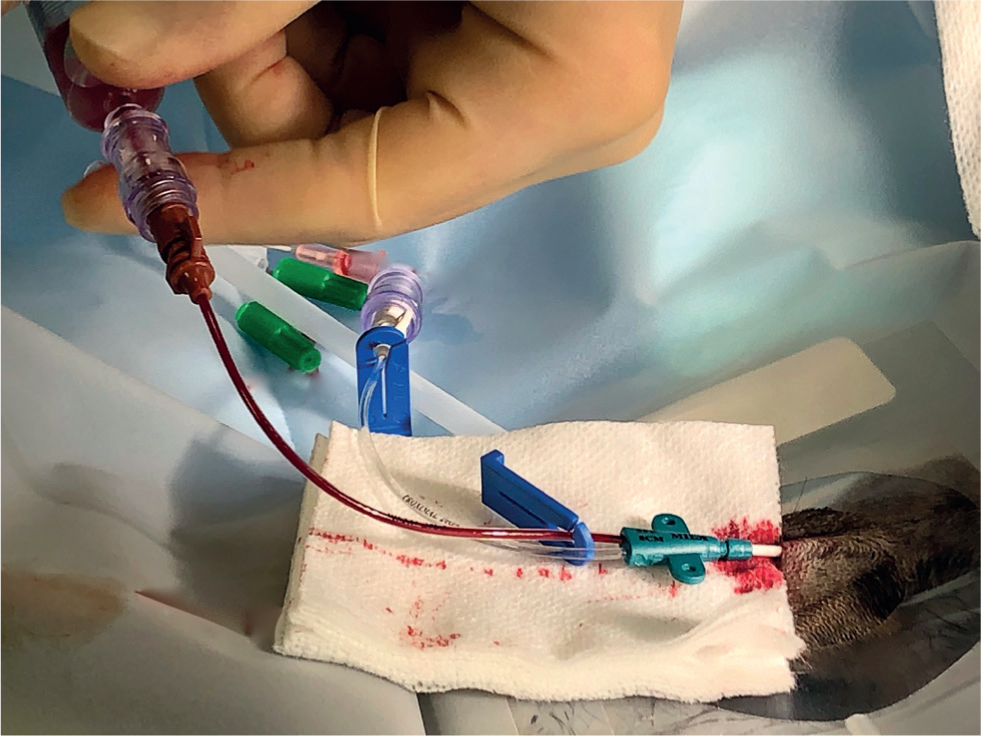
- Remove the guidewire, aspirate all ports of the catheter to avoid air embolism and flush with saline to check for free flow (Figure 13).
- Secure the catheter in place with sutures, usually at the two wings of the catheter and at the base of the catheter where there is a groove (Figure 14).
- Correct placement of the CVJC can be checked with thoracic imaging (lateral thoracic radiograph) as the catheter is radio-opaque.
- Place a sterile dressing over the catheter site. This should be removed at least once a day to check the site for any local erythema, swelling, discharge or discomfort on palpation. If there are any concerns or unexplained pyrexia after placing the CVJC it should be removed.


Conclusions
Placing a CVJC is an advanced technique that should always be done aseptically. It will provide central venous access and help with management of critically ill animals by permitting large fluid infusions, administration of irritant drugs and regular blood sampling. It is important to routinely check the CVJC site for any signs of infection
KEY POINTS
- Aseptic technique is required throughout the placement of a central venous jugular catheter.
- Always keep a hand on the guidewire.
- Check the central venous jugular catheter daily for any signs of infection.