Video otoscopy is increasingly being used as a useful tool in the diagnosis and treatment of canine and feline otitis (Paterson and Tobias, 2012). The KarlStorz (Slough, UK) and OTOPet-USA (Potomac, MD, USA) are the two commonly used systems in Europe and the USA respectively. When approaching an otitis case, clinicians should always seek to identify the primary and secondary causes of otitis, as well as predisposing and perpetuating factors (Table 1). This is essential for appropriate therapy, and to prevent a vicious cycle of increasingly resistant microbial infections and progressive pathological changes that may lead to requirement for total ear canal ablation and bulla osteotomy.
Table 1. Primary and secondary causes, and predisposing and perpetuating factors in canine and feline otitis cases
| Primary causes of ear canal otitis | Secondary causes of otitis | Predisposing factors | Perpetuating factors |
|---|---|---|---|
|
|
|
|
Traditionally, general practitioners have flushed ears using a low magnification handheld otoscope and a cut down 8 French polypropylene urinary catheter. A video otoscope offers numerous advantages to this method, as it uses a highly magnified (x25–30) bright light fibre-optic camera that can be used to assess the ear canal structures in fine detail and perform minor surgical procedures (Cole, 2004). Deep cleaning allows complete examination of the canal. Retrograde flushing removes microbes and discharge from the vertical and horizontal canal. This improves the access and efficacy of topical antimicrobials that may be important for antibiotics that are inactivated in purulent discharge (such as gentamicin and polymyxin B). Procedures commonly performed with a video otoscope are summarised in Table 2. During the video otoscopy procedure, images and films of the ear may be taken as clinical records. These are also useful to educate the client and monitor otitis improvement over time.
Table 2. Common procedures undertaken with a video otoscope
| Video otoscopy equipment can be used for the following tasks: |
|---|
|
Step 1: preparing for the procedure
- If the ear canal is significantly hyperplastic before ear flushing, a 2–3-week course of an anti-inflammatory dose of topical or oral glucocorticoids (such as prednisolone 1mg/kg/day) is often beneficial to reduce inflammation and stenosis, improving access to the canal (Cole, 2004). During this time, topical therapy may be provided on an empirical basis based on preliminary cytology results
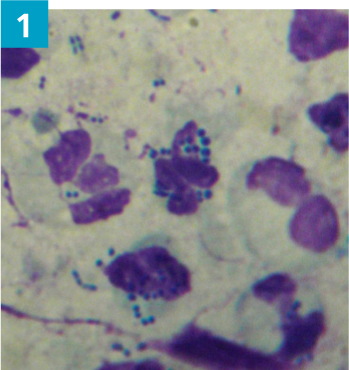
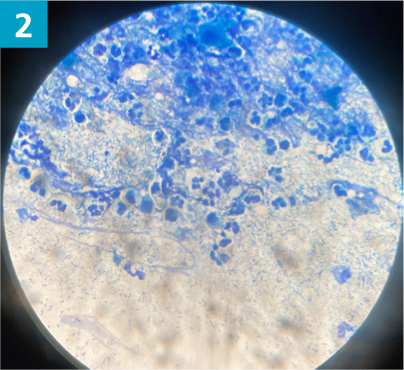
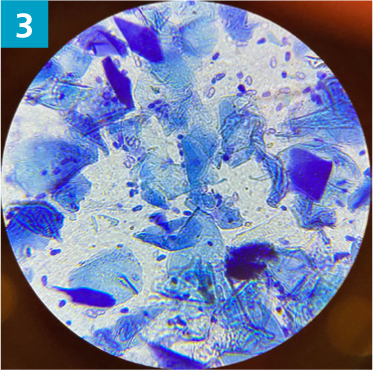
- Cytology should be performed to assess for secondary microbial infections and presence of inflammatory cells. A dry swab is inserted into the ear canal, to the junction between the horizontal and vertical ear canal, and rotated several times to collect discharge from the canal epithelium. The swab is then gently rolled on to a glass microscope slide and labelled left or right. The slide should be heat fixed and stained using the three stage Modified Wright stain (such as Diff-Quik). Microbes should be documented when present as cocci bacteria, rod bacteria, and Malassezia yeast (Figures 1–3)
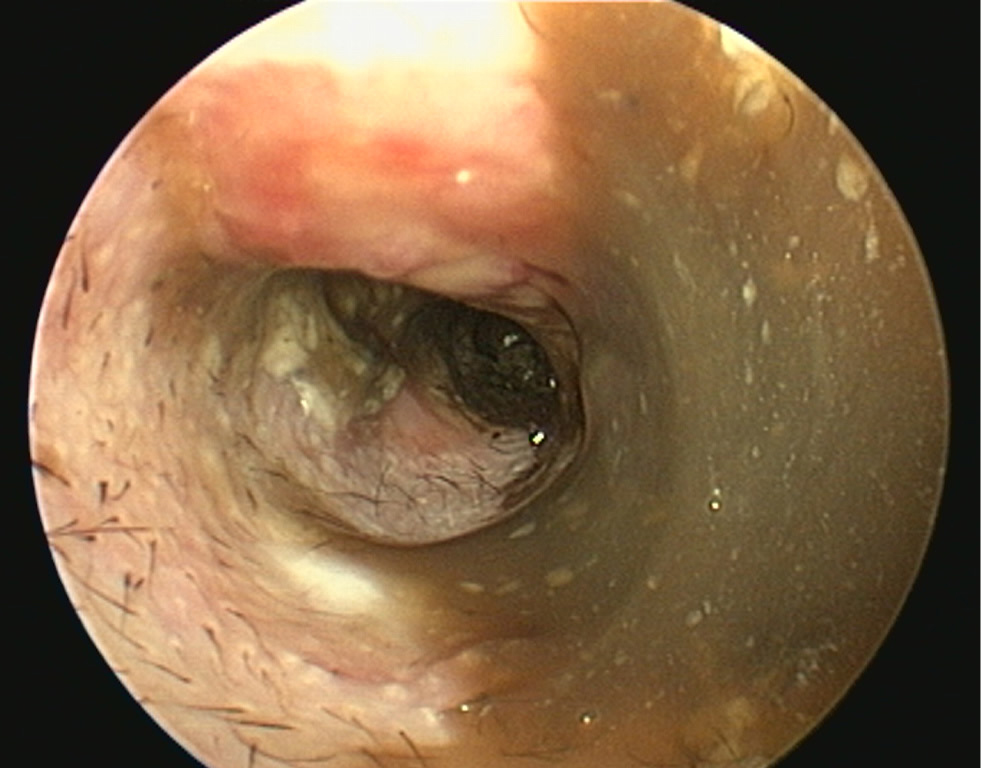
- Biofilm produced by bacteria or yeast may also be visible as a deep purple web-like structure on cytology. Biofilm helps to protect the microorganisms from the immune system and increases their resistance to antimicrobials. It is clinically evident as black or brown slime material on the ear canal epithelium (Figure 4).
- If swabs are to be taken for culture and susceptibility testing, they should be carried out before ear flushing. Indications include: presence of rod bacteria, failure of the otitis to respond to empirical therapy and history of multi-drug resistant infection. Results should only be used as a guideline for treatment as high levels of antibiotics present in topical therapy often overcome apparent resistance based on minimum inhibitory concentration (MIC) data for systemic antimicrobials
- Diagnostic imaging such as computed tomography or magnetic resonance imaging where available can be considered before ear flushing, to assess the external and middle ear. They are useful to assess if myringotomy is indicated, especially when the tympanic membrane is intact but visibly abnormal. These imaging techniques are also indicated if there is clinical evidence of otitis media, or suspicion of a polyp or neoplastic process.
Step 2: anaesthesia
- Video otoscopic ear flushing should be performed under general anaesthesia rather than sedation. If the tympanic membrane is ruptured, there is a risk of contaminated ear flush fluids being pushed into the auditory tube, nasopharyngeal area and respiratory tract. Intubation therefore protects against the risk of aspiration pneumonia.
- General anaesthesia also allows a more thorough and complete clean, as sedated animals frequently head shake as a result of pain during the procedure, especially when working close to the tympanic membrane
- Pre-medicant analgesia should include a full agonist opioid such as methadone (Comfortan, Dechra, UK)
- If the ear is particularly painful, a regional local anaesthesic block may be used (Layne and de Miguel Garcia, 2019)
- The pet should be placed in lateral recumbency for the procedure, with the least severely affected ear facing upwards for initial examination and flushing
- Gloves, mask, apron and goggles should be worn to avoid contamination with bacterial aerosols.
Step 3: soak the ear canal
- The pinna should be lifted dorsally and laterally to straighten the ear canal for the introduction of the otoscope. The video otoscope head should be gently placed into the ear to be flushed and images recorded of the ear canal (Figures 5–8). The integrity of the tympanic membrane should be examined at this stage, if not occluded by debris. Examination for foreign bodies such as grass awns and otodectes can also be performed at this stage. The epithelium can be examined for erythema, hyperplasia, ulceration, stenosis and neoplastic masses
- The type of discharge present should be assessed to select appropriate ear cleaner(s) for use during and after the flush (Figures 9 and 10). In dogs, the ear canal should be soaked with the selected ear cleaner for 5 minutes (Table 3). Soaking the ear in a ceruminolytic cleaner is useful to loosen waxy debris. N-acetyl cysteine is useful to break down biofilm. If the tympanic membrane is known to be ruptured, the choice of cleaning product should be adjusted accordingly to reduce the risk of ototoxicity. Owing to the risk of Horner's syndrome in cats, ceruminolytics are not recommended in this species.
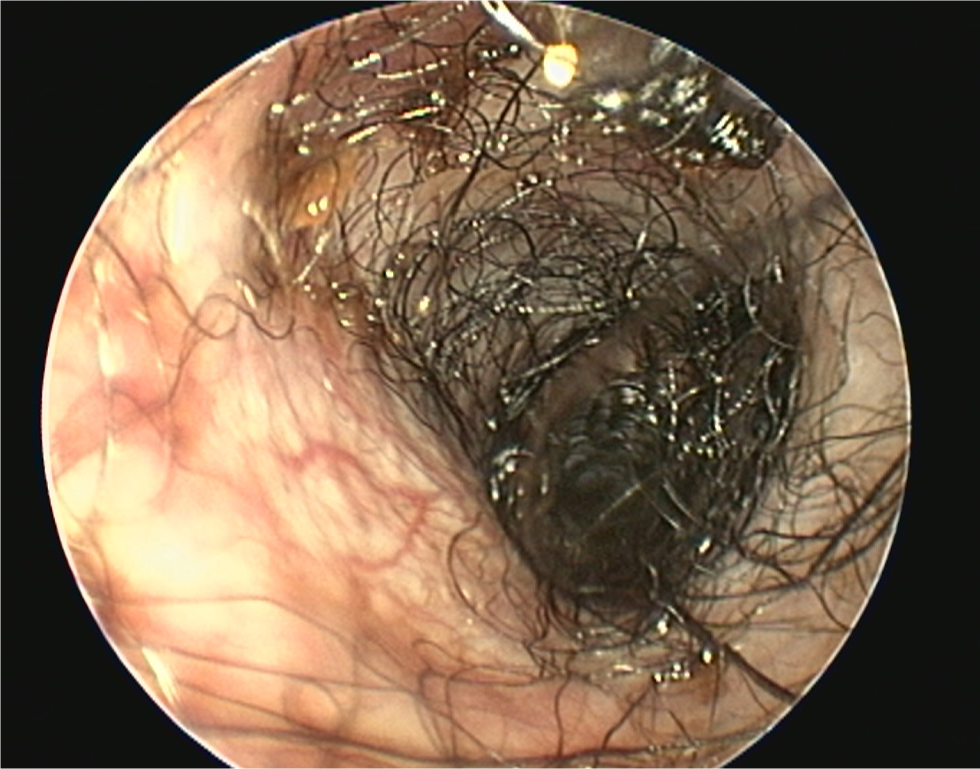
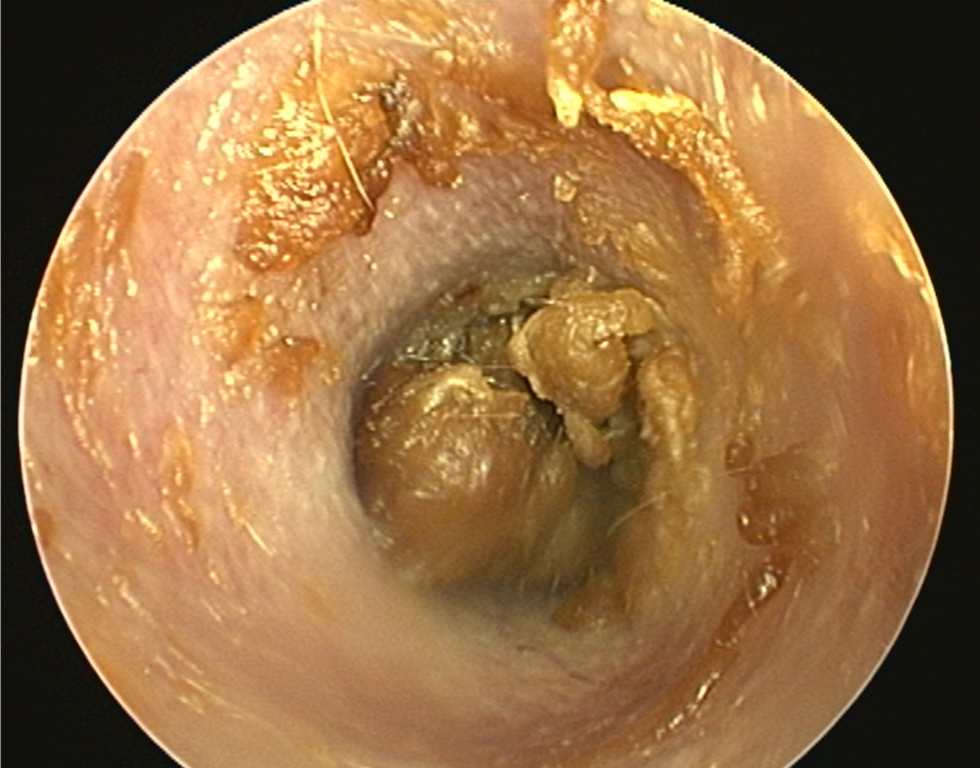
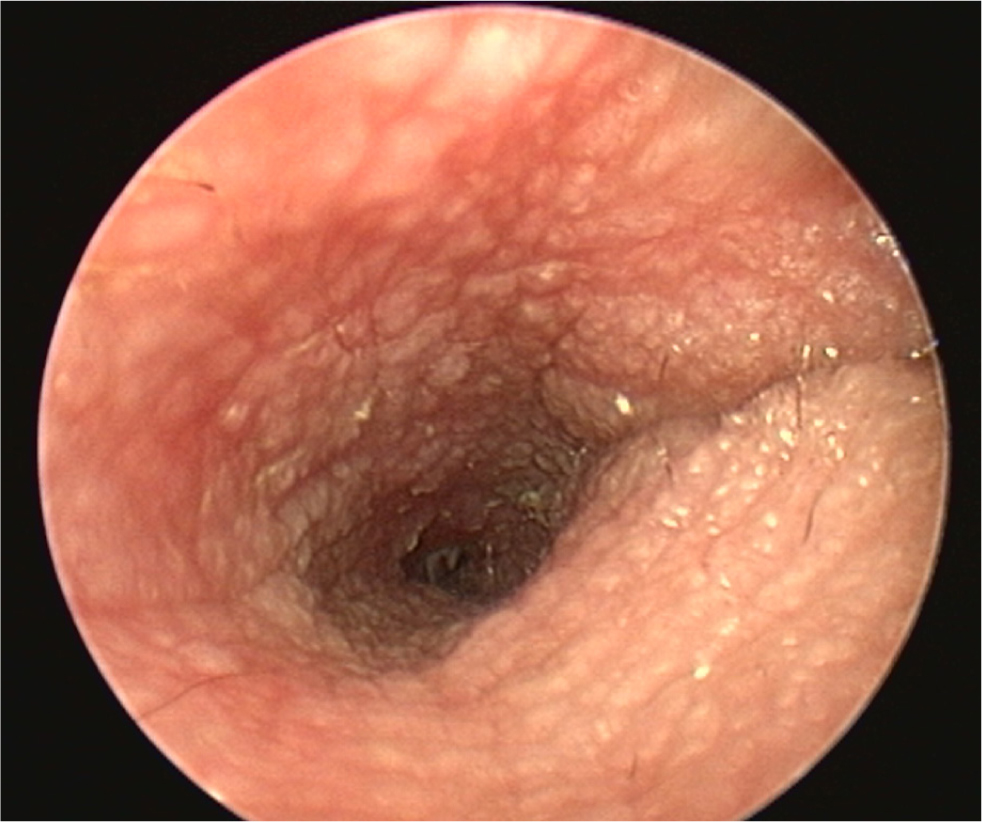
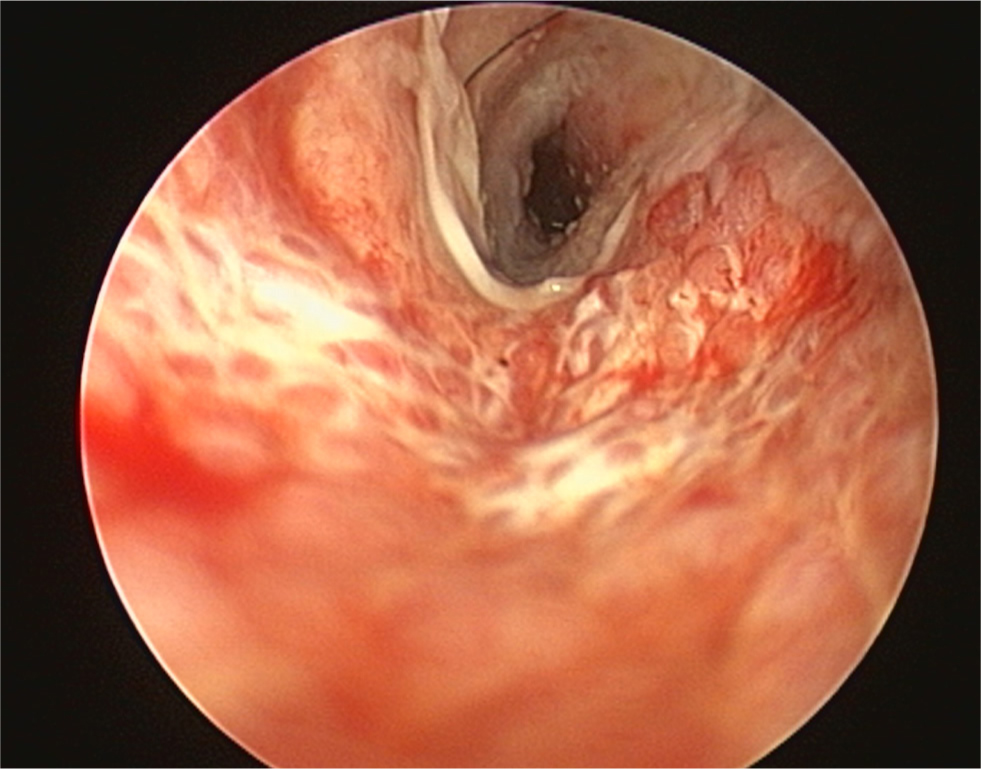
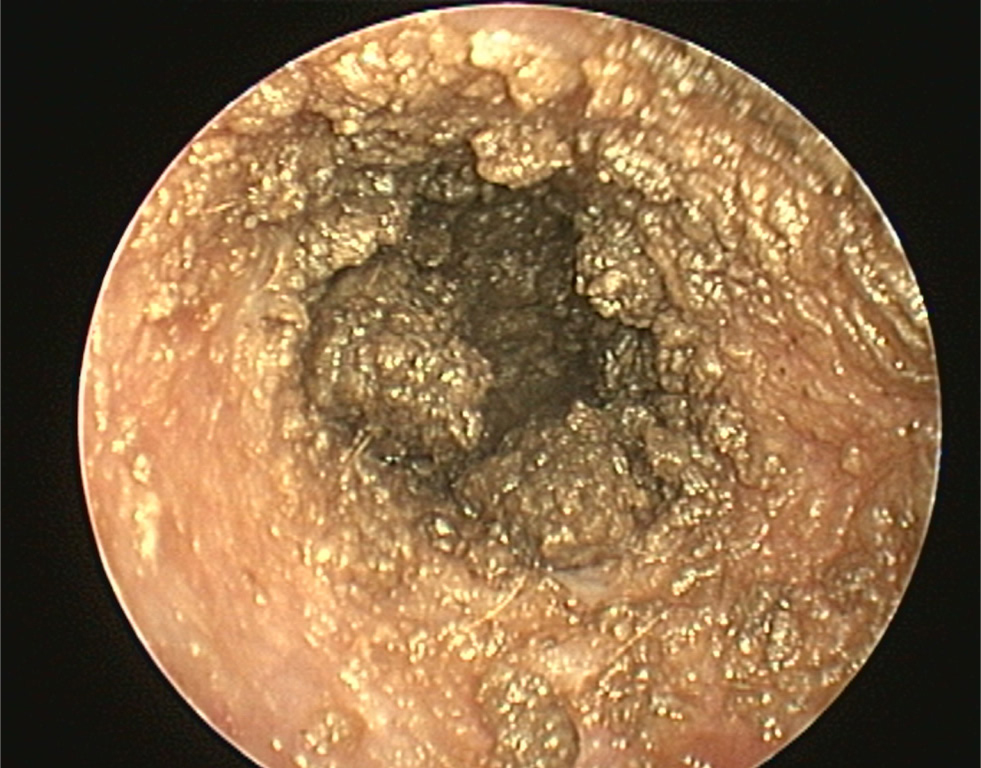
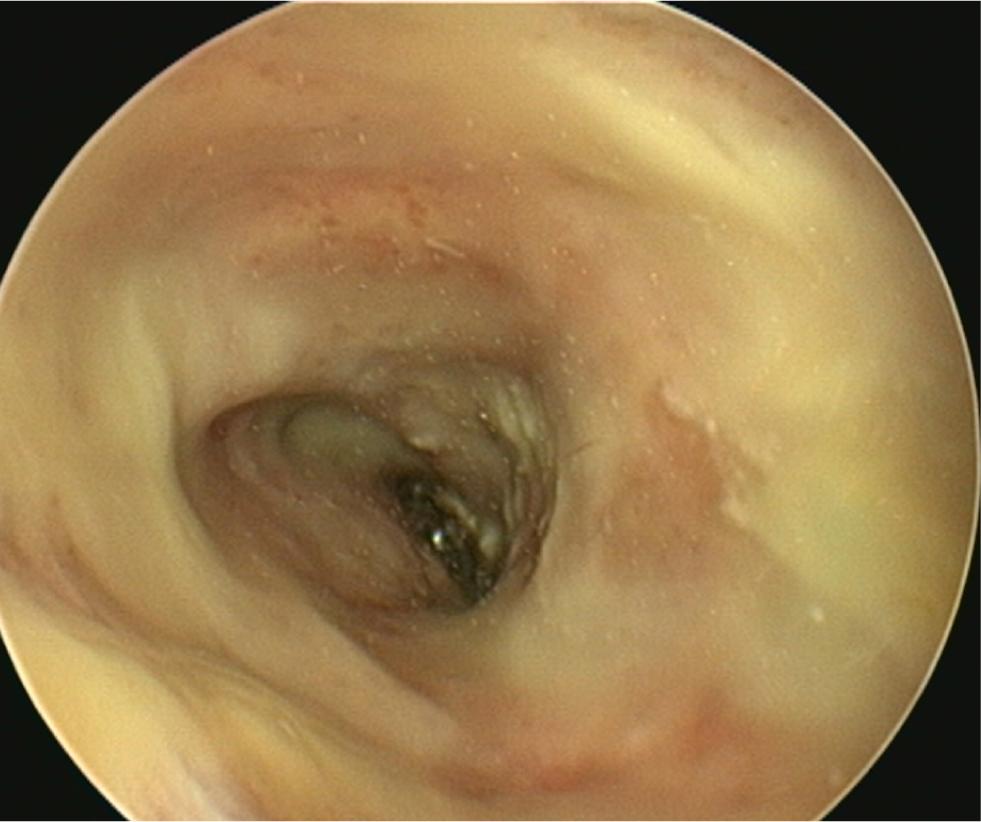
Table 3. Choosing an appropriate cleaner for an ear flush procedure
| Product: | Indications, advantages and disadvantages: |
|---|---|
| Isotonic saline 0.9% (NaCl) |
|
| TrisEDTA (TrisEDTA, ICF) |
|
| TrisEDTA with 1-2% acetyl cysteine (TrisNAC, ICF) |
|
| TrisEDTA and 0.13% Chlorhexidine (TrisChlor, Otodine) |
|
| Squalene Otoact (ICF, also contains salicylic acid)Cerumaural (Dechra) |
|
| Carbamide peroxide (Otoprof, ICF) |
|
| Combination products: Cleanaural (Dechra)Clorexyderm oto (Nextmune)Epiotic (Virbac)Malacetic otic (Dechra)Otoclean (Elanco)Sonotix (Vetoquinol)Surosolve (Elanco) | Drying and disinfecting agents, useful for prophylaxis of recurrent otitis externa in mildly inflamed ceruminous ears. Some also have ceruminolytic activity.These commonly contain organic oils and solvents. Formulations may include dioctyl sodium sulfosuccinate, propylene glycol, glycerin, acetic/boric/citric/lactic/salicylic acid, parachlorometaxylenol and isopropyl alcohol.
|
Step 4: flushing and removal of debris
- After an initial soak, sterile isotonic saline is used as the main ear flush fluid. A 5 French catheter is placed through the working channel of the otoscope head and used to flush fluid into the canal. Fluid may be flushed and suctioned by hand using a 10ml syringe attached to a Luer lock, or mechanically flushed using irrigation and suction system (such as VETPUMP2, KarlStorz, or Earigator, OTOPet-USA). Placing the catheter deeper than the debris allows retrograde flushing of material out of the canal.
- The 2mm working channel of the otoscope head may be used with various 1.8mm endoscopic instruments. A 5–7mm Otex brush (KarlStorz) is useful for loosening debris that is adhered to the canal epithelium (MP4 1), the brush is inserted into the canal and gently rotated while being extracted. Grasping forceps for removal of foreign material and large ceruminoliths (MP4 2), and biopsy forceps for sampling hyperplastic glandular tissue, polyps and tumours. An ear curette is useful to remove large particles of debris and can be gently used close to the tympanic membrane to aid removal of loose epithelium (MP4 3). The curette is advanced and gently pressed against the epithelium and extracted to loosen and remove debris. A loop snare for polypectomy and a 2-way stopcock for simultaneous use of instruments while flushing is also available with the KarlStorz system. Care must be taken using instruments adjacent to the tympanic membrane to avoid iatrogenic damage
- Carbamide peroxide is effervescent in the canal and useful to remove small debris particles and loose epithelium. As this product is ototoxic, it should not be used if the tympanum is ruptured, and it must be flushed out of the canal after use
- If the humidity of the ear canal is causing misting of the video otoscope glass tip, the author commonly uses Ultrastop defogger spray (KarlStorz) to improve clarity of the images before placing the scope into the canal
- If the humidity of the ear canal is causing misting of the video otoscope's glass tip, use of Ultrastop defogger spray (KarlStorz) may improve clarity of the images prior to before placing the scope into the canal.
Step 5: assessment of the tympanic membrane
- Once the ear is clean, the integrity of the tympanic membrane should be assessed
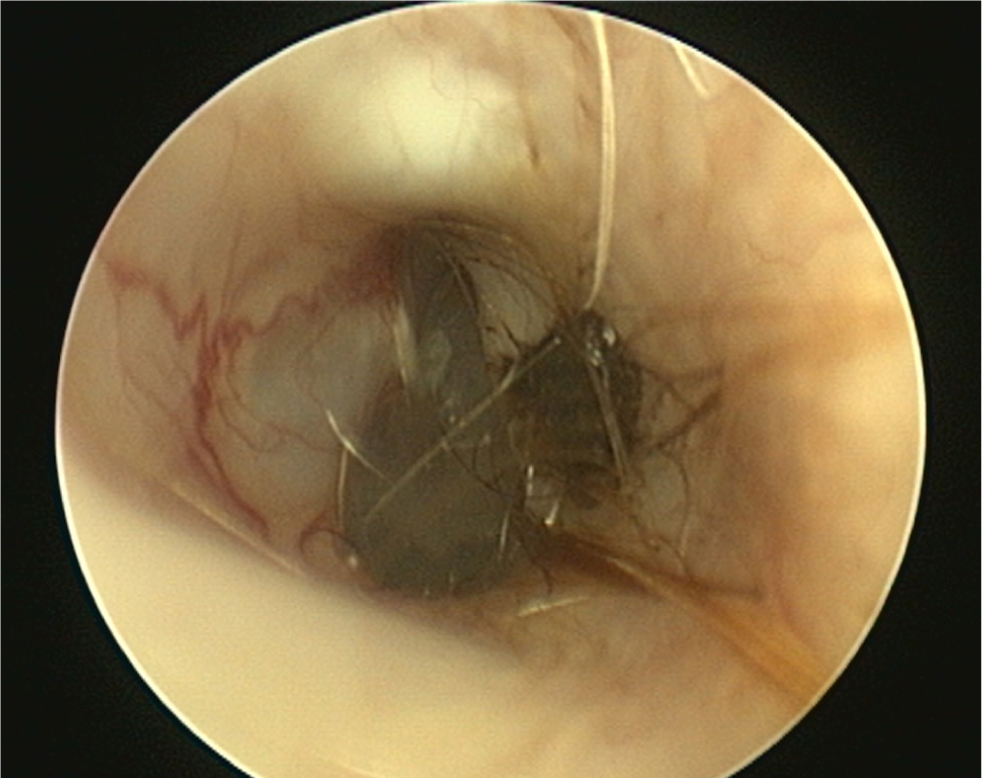
- A normal tympanic membrane has a translucent pars tensa allowing visualisation of the head of the malleus and light pink pars flaccida containing blood vessels (Figure 11). There should be scant cerumen and a small number of hairs adjacent to the membrane
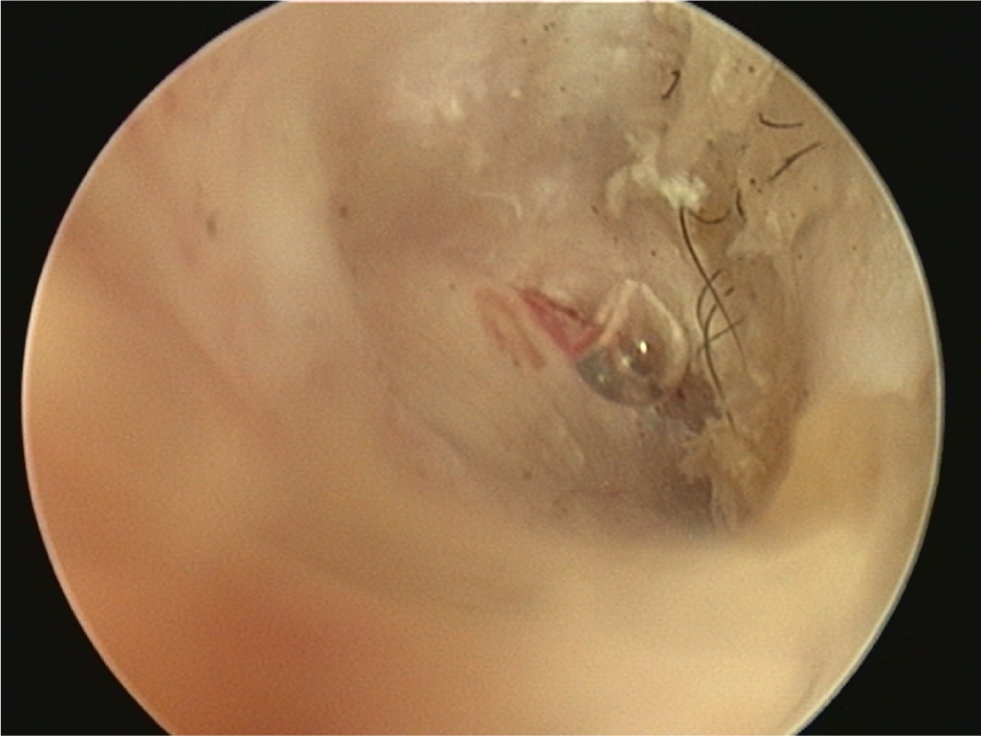
- An intact tympanic membrane may be noted to bounce during flushing (MPV 4). If bubbles are seen appearing from the membrane, a small tear is present (Figure 12)
- Accidental damage of the tympanic membrane can occur during the flush if the membrane is particularly fragile from prior inflammation, or with use of tools adjacent to the membrane. The membrane has the ability to heal with resolution of the otitis and infection in 2–5 weeks
- If middle ear disease is suspected, aspirated fluid samples may be taken from the middle ear for cytology, culture and susceptibility. The middle ear is sampled via a pre-existing tear in the tympanic membrane or by performing a myringotomy. Myringotomy is not routinely recommended for cats
- Myringotomy is performed in the caudoventral aspect of the pars tensa to avoid the ossicles, acoustic or vestibular windows of the middle ear. A 0.7mm myringotomy needle may be used if available, or the end of the flushing catheter may be cut diagonally to form a point that is pressed against the tympanic membrane to form an incision and directed caudoventrally. A small amount of isotonic sterile saline should be flushed into the middle ear and aspirated back to obtain a sample for cytology and culture
- If the tympanic membrane is discovered to be ruptured after a potentially ototoxic product has been applied, the middle ear should be gently but thoroughly cleaned by placing the catheter caudoventrally into the middle ear and performing retrograde flushing using isotonic sterile saline to remove the cleaner
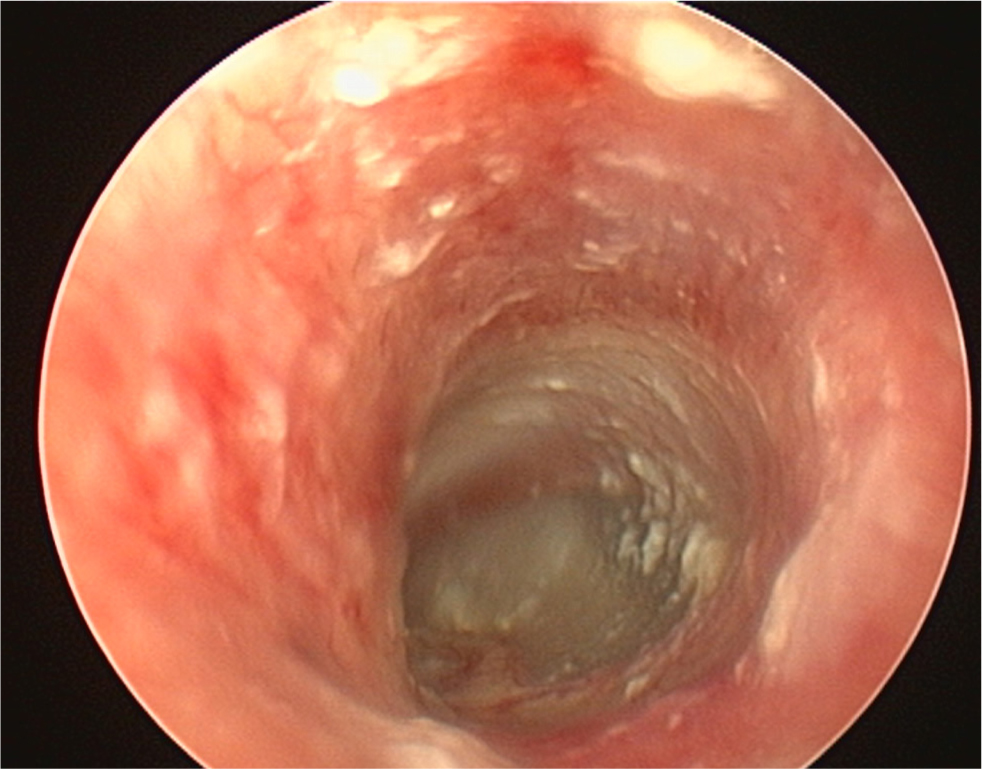
- An intact tympanic membrane does not rule out otitis media as the tympanum may heal and trap infected debris in the middle ear (Cole et al, 1998). When this has occurred, the membrane is often visibly abnormal (Figure 13).
Step 6: drying the ear canal and application of therapy
- The ear canal should be aspirated thoroughly to dry the area before the application of treatment. A measured dose is given to fill the ear canal (usually 0.5–1.2ml depending on the size of the patient's ear canal) (Rosychuk, 2008). The choice of antimicrobial is beyond the scope of this article
- Follow up topical ear cleaning and antimicrobial treatment should be selected based upon cytology, culture findings (if applicable), tympanic membrane integrity, biofilm presence, and discharge type. Daily post-flush ear cleaning should be limited to a couple of weeks to avoid over-cleaning and maceration of the ear canal
- The author usually performs a followup examination 2–4 weeks after the ear flush. At this stage, a second ear flush may be required. Once a canine otitis case has adequately resolved, preventative treatments are advisable in cases of otitis secondary to allergy to prevent relapse. In this instance, the author commonly uses twice-weekly antimicrobial ear cleaners (the choice of which is case-dependent, Table 3) followed by topical steroid application (Recicort, Dechra).
Complications after ear flushing
Pain and head shaking are common if inadequate analgesia is administered. Postoperatively, glucocorticoid anti-inflammatories such as prednisolone 0.5–1mg/kg are often prescribed on a reducing dose regime. Addition of non-steroidal anti-inflammatory drugs may improve analgesia and are used via the veterinary cascade or off license, such as tramadol 2–4mg/kg up to three times daily (Tralieve), gabapentin 10–15mg/kg 2–3 times daily, or paracetamol 10mg/kg twice daily (for 5 days, dogs only). The duration of such treatment is individualised to the case.
Neurological damage of sensitive structures in the middle ear is rare in dogs and may include Horner's syndrome, facial nerve paralysis, peripheral vestibular disease and deafness. Horner's syndrome is more common in cats post-ear flush procedure, as the branch of the sympathetic nerve running through the bulla septum is susceptible to injury during ear cleaning. Client education regarding this risk is important before flushing.

